
Supplies
3.0-3.2v white LED220Ohm - 1/4 Watt - 5% resistors
9v battery
9v battery connector
plastic case (mine were old pin cases) big enough for 9v+ some
SPDT toggle switch
Soldering Iron
Solder
wire cutters
Directions
1. Put holes in your plastic cases, if the 9v fits snuggly, not where it will make it tighter. Make sure the holes cut are a snug fit for the led on one end, and the bottom of the toggle switch on the other end (but the toggle hole should be big enough that the whole toggle switch can fit through sideways.
2. Trim, and strip (1/2in) the ends of the connector wires so that they are the right size. The black wire will go up through the toggle switch hole, the red to the LED hole.
3. If too much electricity goes into a LED, it will fizzle out. What resistors do is make sure only the correct amount of E- gets let through. Above I linked to the amazon sellers where I got my stuff. You will notice it is very affordable for a group activity. If for some reason you only have 5v or something weird for LED here is how you find the appropriate resistor strength. Not all resistors are the same, those little lines signify their power. I will explain which end to solder to which part. Make sure to read for resister end wire color vs 9v cap wire color

Sticking the two wires up through the hole, so as not to melt your container, solder the resistor's gold end wire to the middle of the toggle switch's bottom rung.
4. Solder the 9v cap's black wire to the end rung, making sure not to get solder between the two. Then move the wires and bottom bit into the plastic, so it fits snuggly.
5. On an LED there are two legs. Stick those into the box through the LED hole.
The positive leg is the longer leg, negative shorter. In electricity negative=black=cathode, red=+=anode. My brain thing to remember that is not a true reminder, but works for me (black cat(hode)s are bad(negative)).
Solder the resistor's red ring wire end to the short leg of the led

6. Now solder the red wire from the 9v cap to the long leg of the LED (see above)

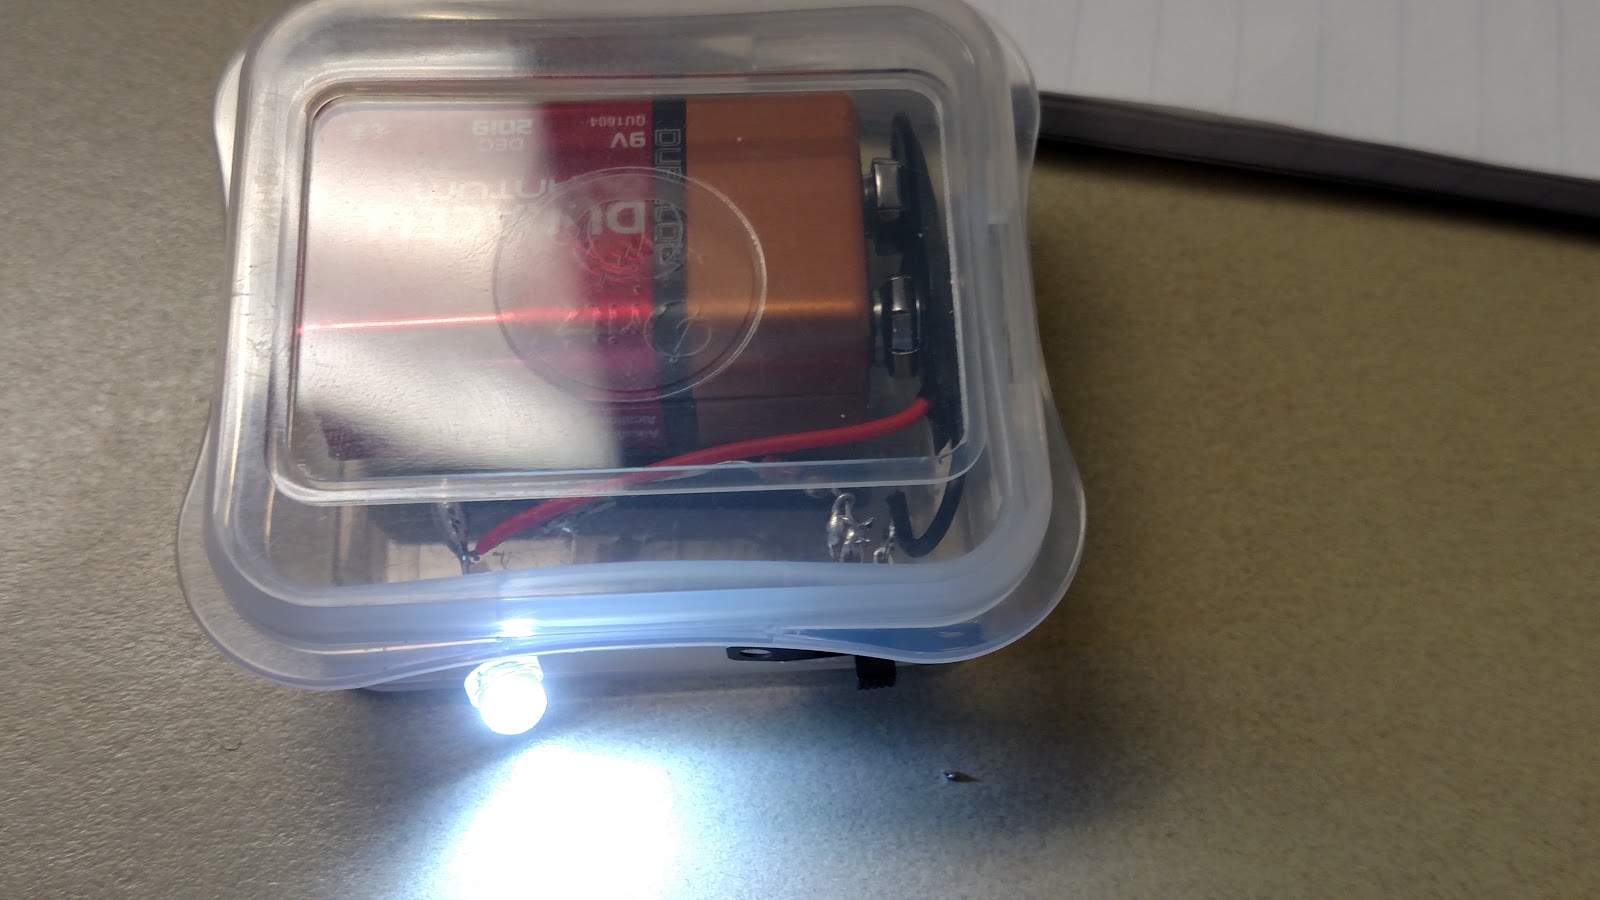
7. Snap the 9v cap on the 9v, and flip the switch. It should GLOW!


Notes:
1. Electricity can be dangers if handled inappropriately, learn more about electricity here